The activities of distribution or manufacturing companies may call for several sites and warehouses across the country, and items are transferred between the warehouses of the same company. Usually there is a central warehouse and transfers mainly run from it towards the secondary warehouses. Still, for various reasons – unexpected demand, transport optimisation – transfers can also occur between the secondary warehouses.
All these item transfers have to be traceable in the ERP system, and in Dynamics Business Central this is done through transfer orders. Before transfer orders can be used, a number of setups are required in Business Central, and in this article we will show what they are.
In-transit locations
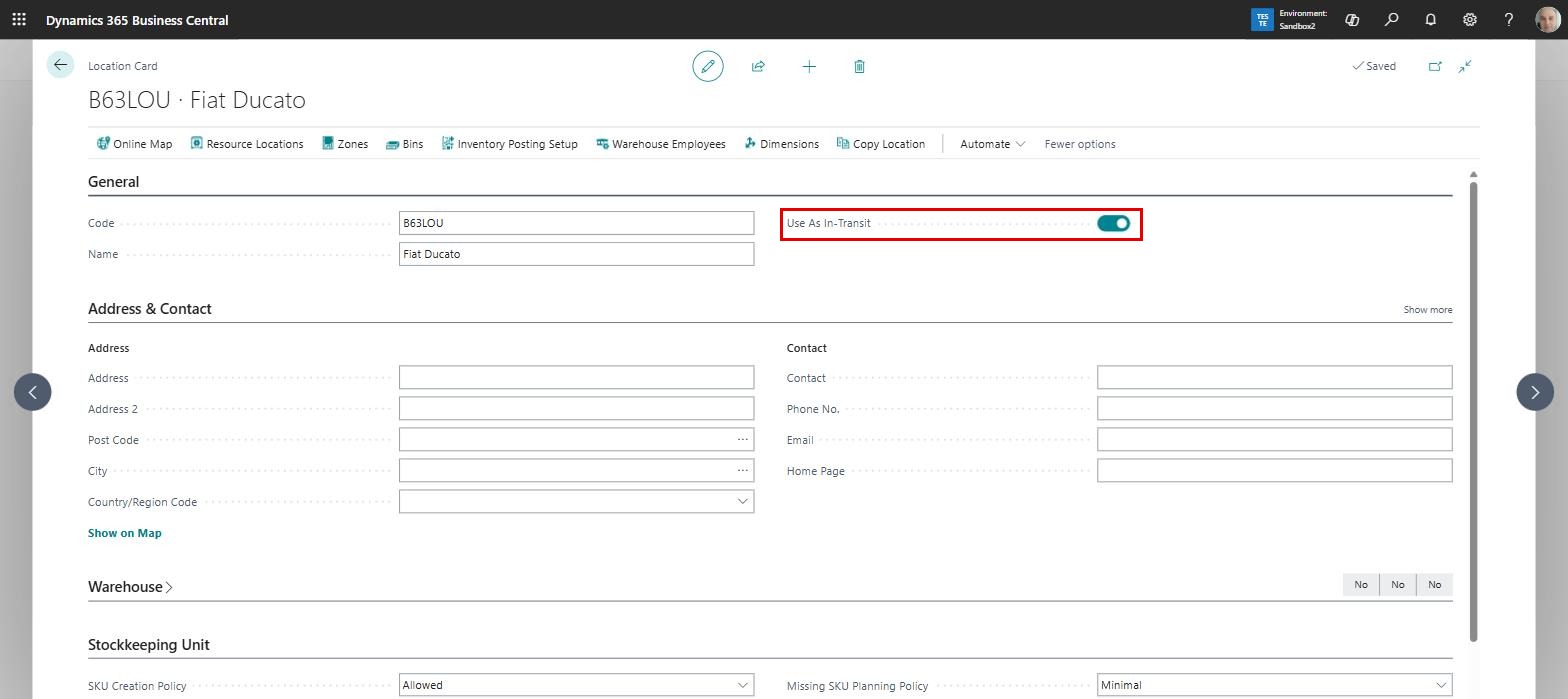
First of all, we have to define the in-transit locations. When items leave one of the company’s warehouses, they are in transit, in a means of transport, and that is why they have to be accounted for, in quantity and value, in a special location of the in-transit type, until they are received at the company’s other warehouse. In-transit locations are defined just like ordinary locations, the only difference being a mark that has to be made on the “Use As In-Transit” field. In the image below we have created a location whose code is the registration number of a vehicle from the company’s own fleet.
You can find details on how to create locations in the article: How to Set Up Locations in Business Central
Transfer activities can be carried out either with the company’s own fleet or by calling on shipping agents. If you use both methods, we recommend defining at least two in-transit locations, one for delivery with your own fleet, the other for delivery through agents.
The transfer routes matrix
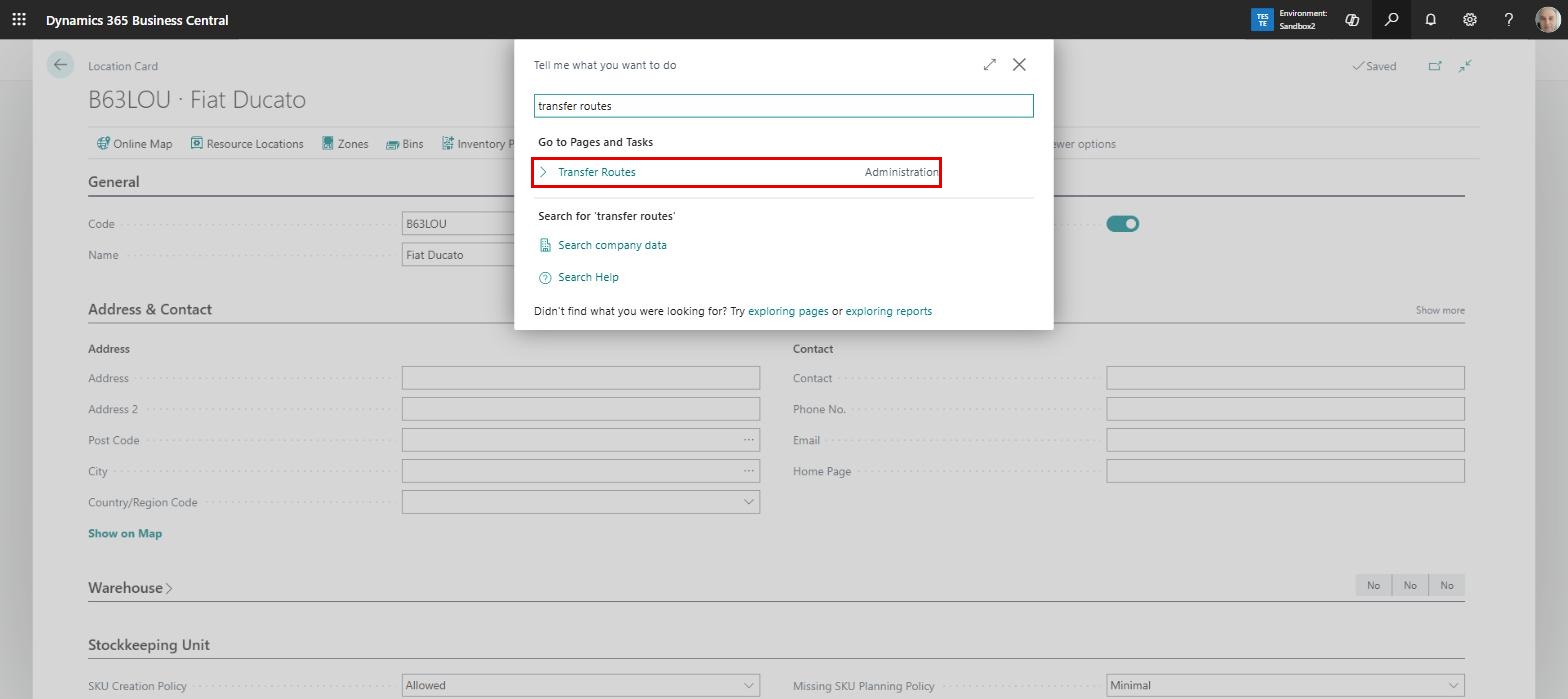
Once we have defined the in-transit locations, we will have to establish the possible links between the company’s warehouses. The idea is that not every route between any two warehouses should be possible; only the routes that are actually used should be found in the system, together with their in-transit locations. These settings are made through a matrix page, which is most easily reached using the search function: Transfer Routes
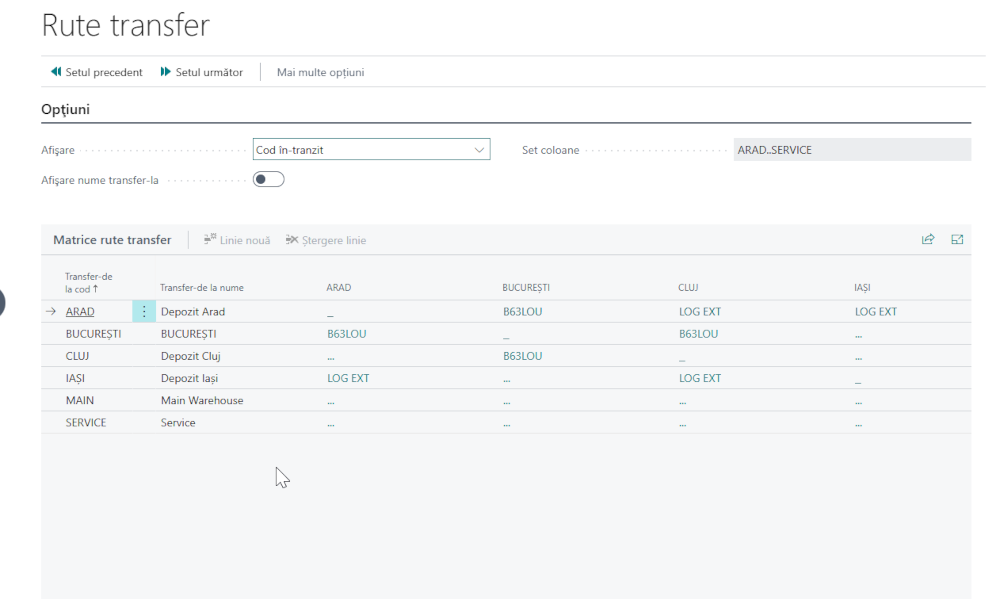
A matrix page opens, with the locations both on the rows and on the columns. A transfer route between two locations is defined by clicking the field at the intersection of those locations. A route setup card opens and here we fill in the “In-Transit Code”, selecting one of the available in-transit locations.
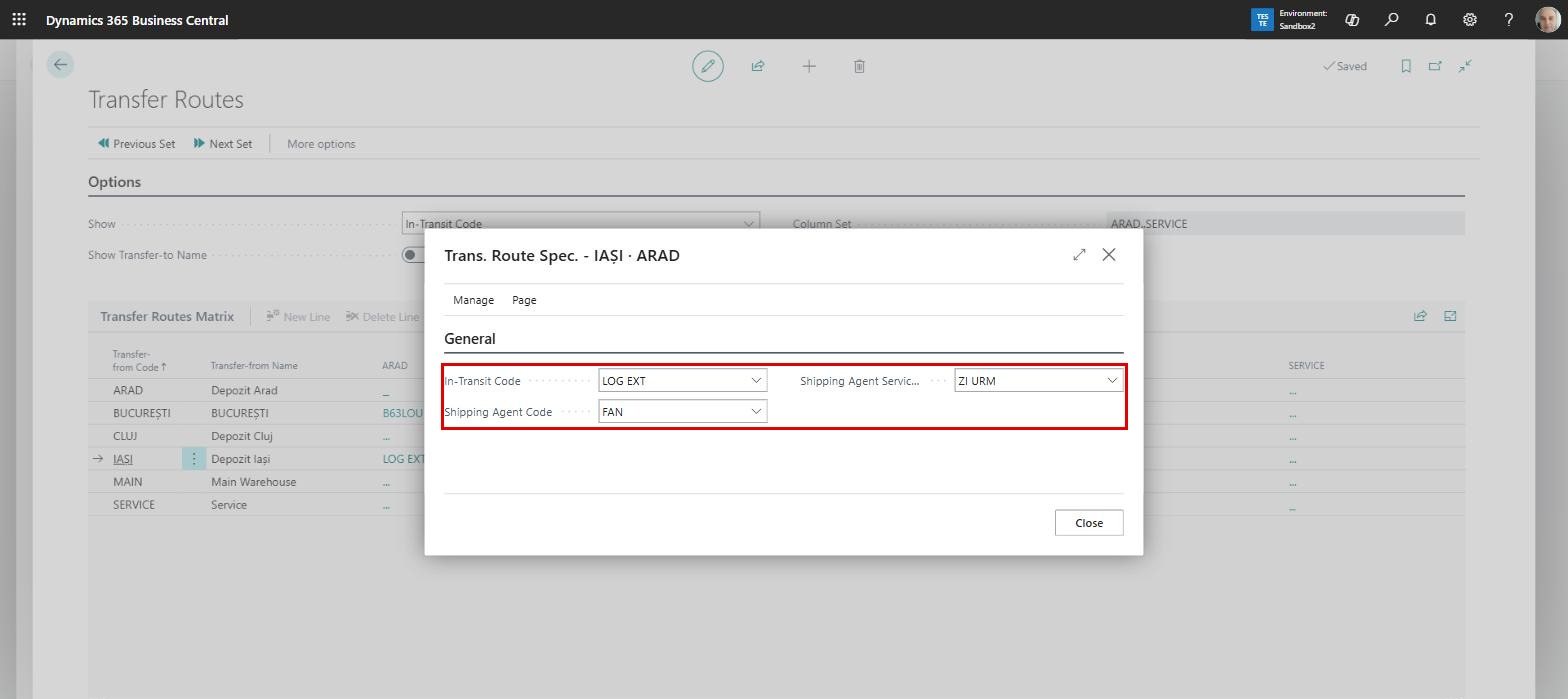
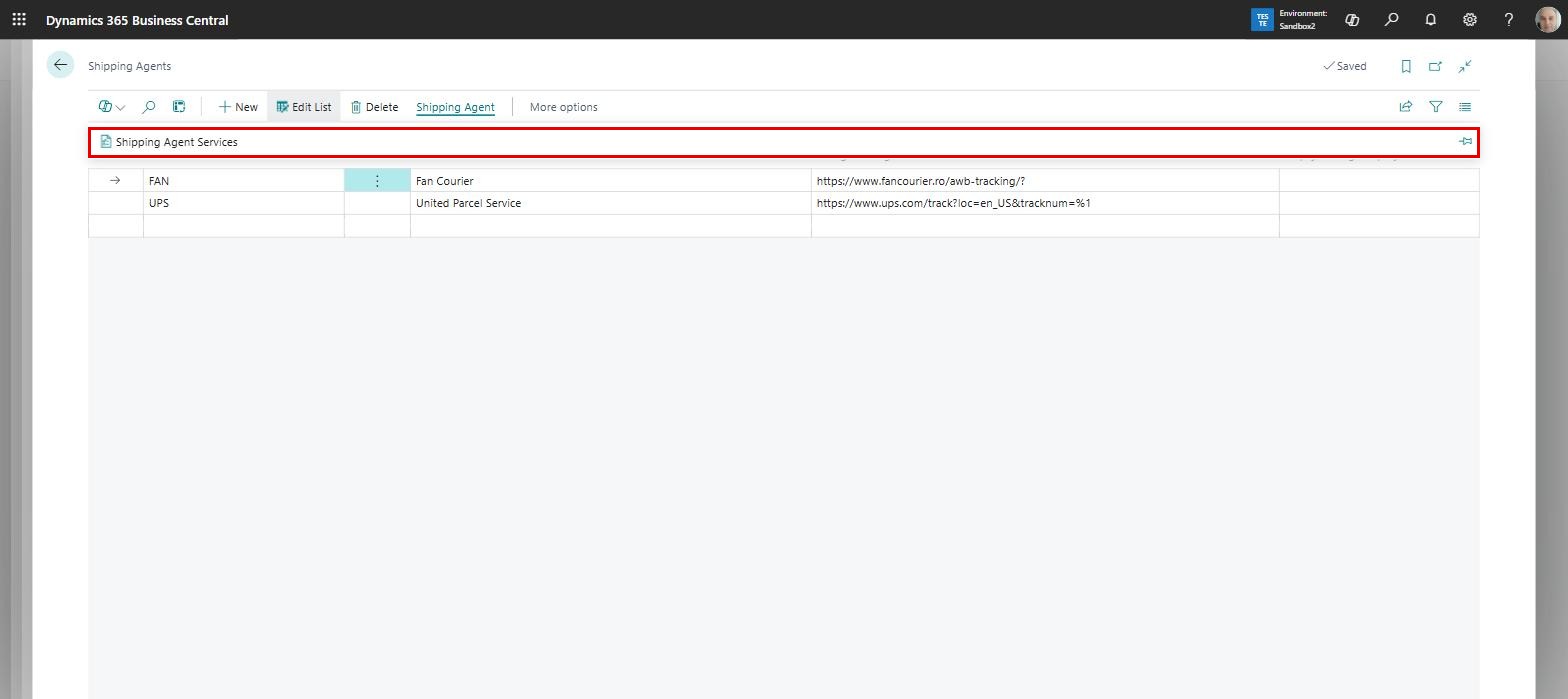
If we use shipping agents, we also have the “Shipping Agent Code” and “Shipping Agent Service Code” fields at our disposal. In the first one we select the shipping agent to be called on (specialised companies such as FAN Courier, UPS etc.), while in the “Shipping Agent Service Code” field we select a code that reflects how long the transport will take. It is important to fill in this field when you have to promise customers a certain delivery date, because the system will also take into account the transport time of the items on the transfer order. Shipping agents and shipping agent service codes can be set up beforehand using the search function: Shipping Agents, and then the Shipping Agent->Shipping Agent Services path
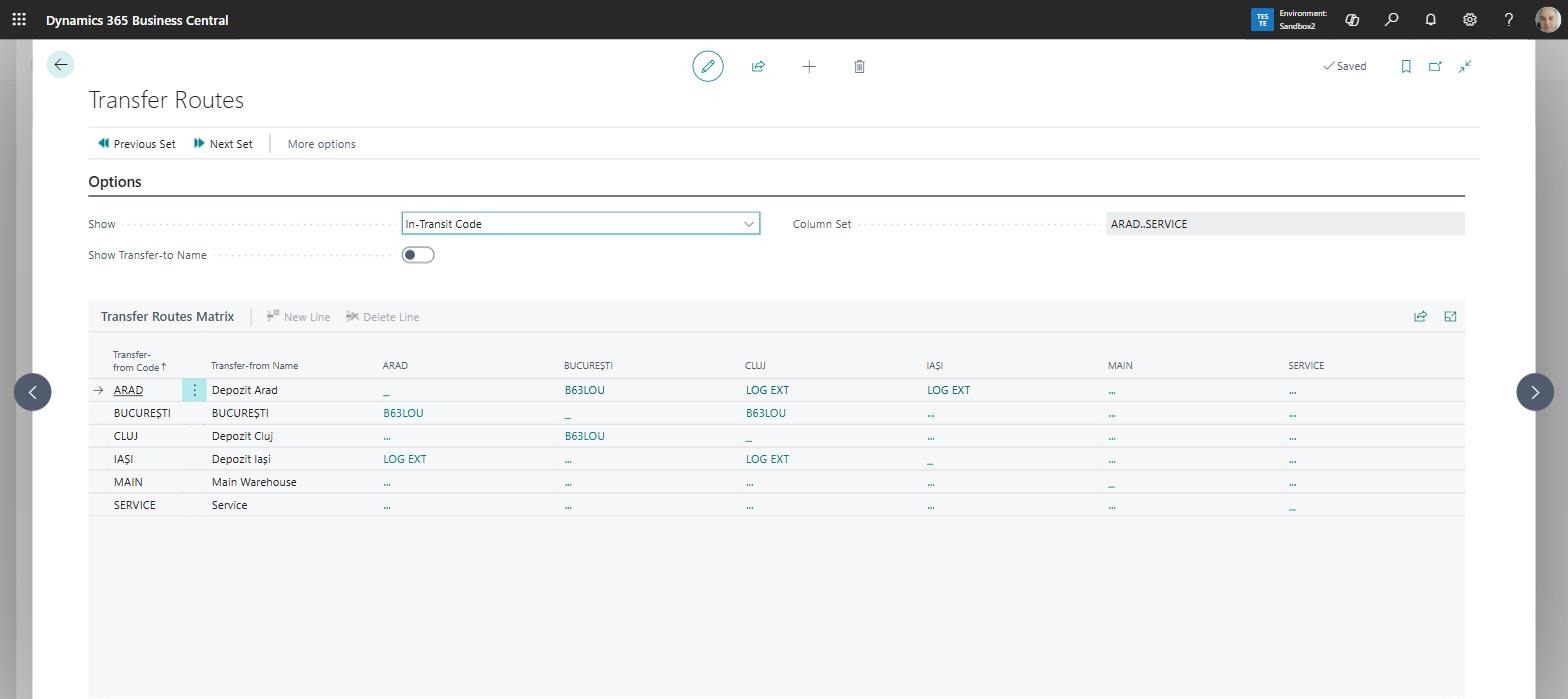
Once the transfer route settings are made, the matrix could finally look like this:
After this setup has been carried out as well, transfer orders can be entered. In a future article we will detail how to work with transfer orders.
ELIAN Solutions has been active since 2008 as an implementer of Microsoft Dynamics 365 Business Central . With a team of over 80 specialists and a portfolio of more than 400 clients, ELIAN Solutions is one of the leading ERP partners.